
Adding Team Members to Your Account
Overview:
Reposite includes a convenient way for existing users to invite their co-workers to join their Reposite organization. This makes adding new team members quick and efficient, helping planners expand their teams and collaborate more seamlessly.
How to Add Users to Your Reposite Organization
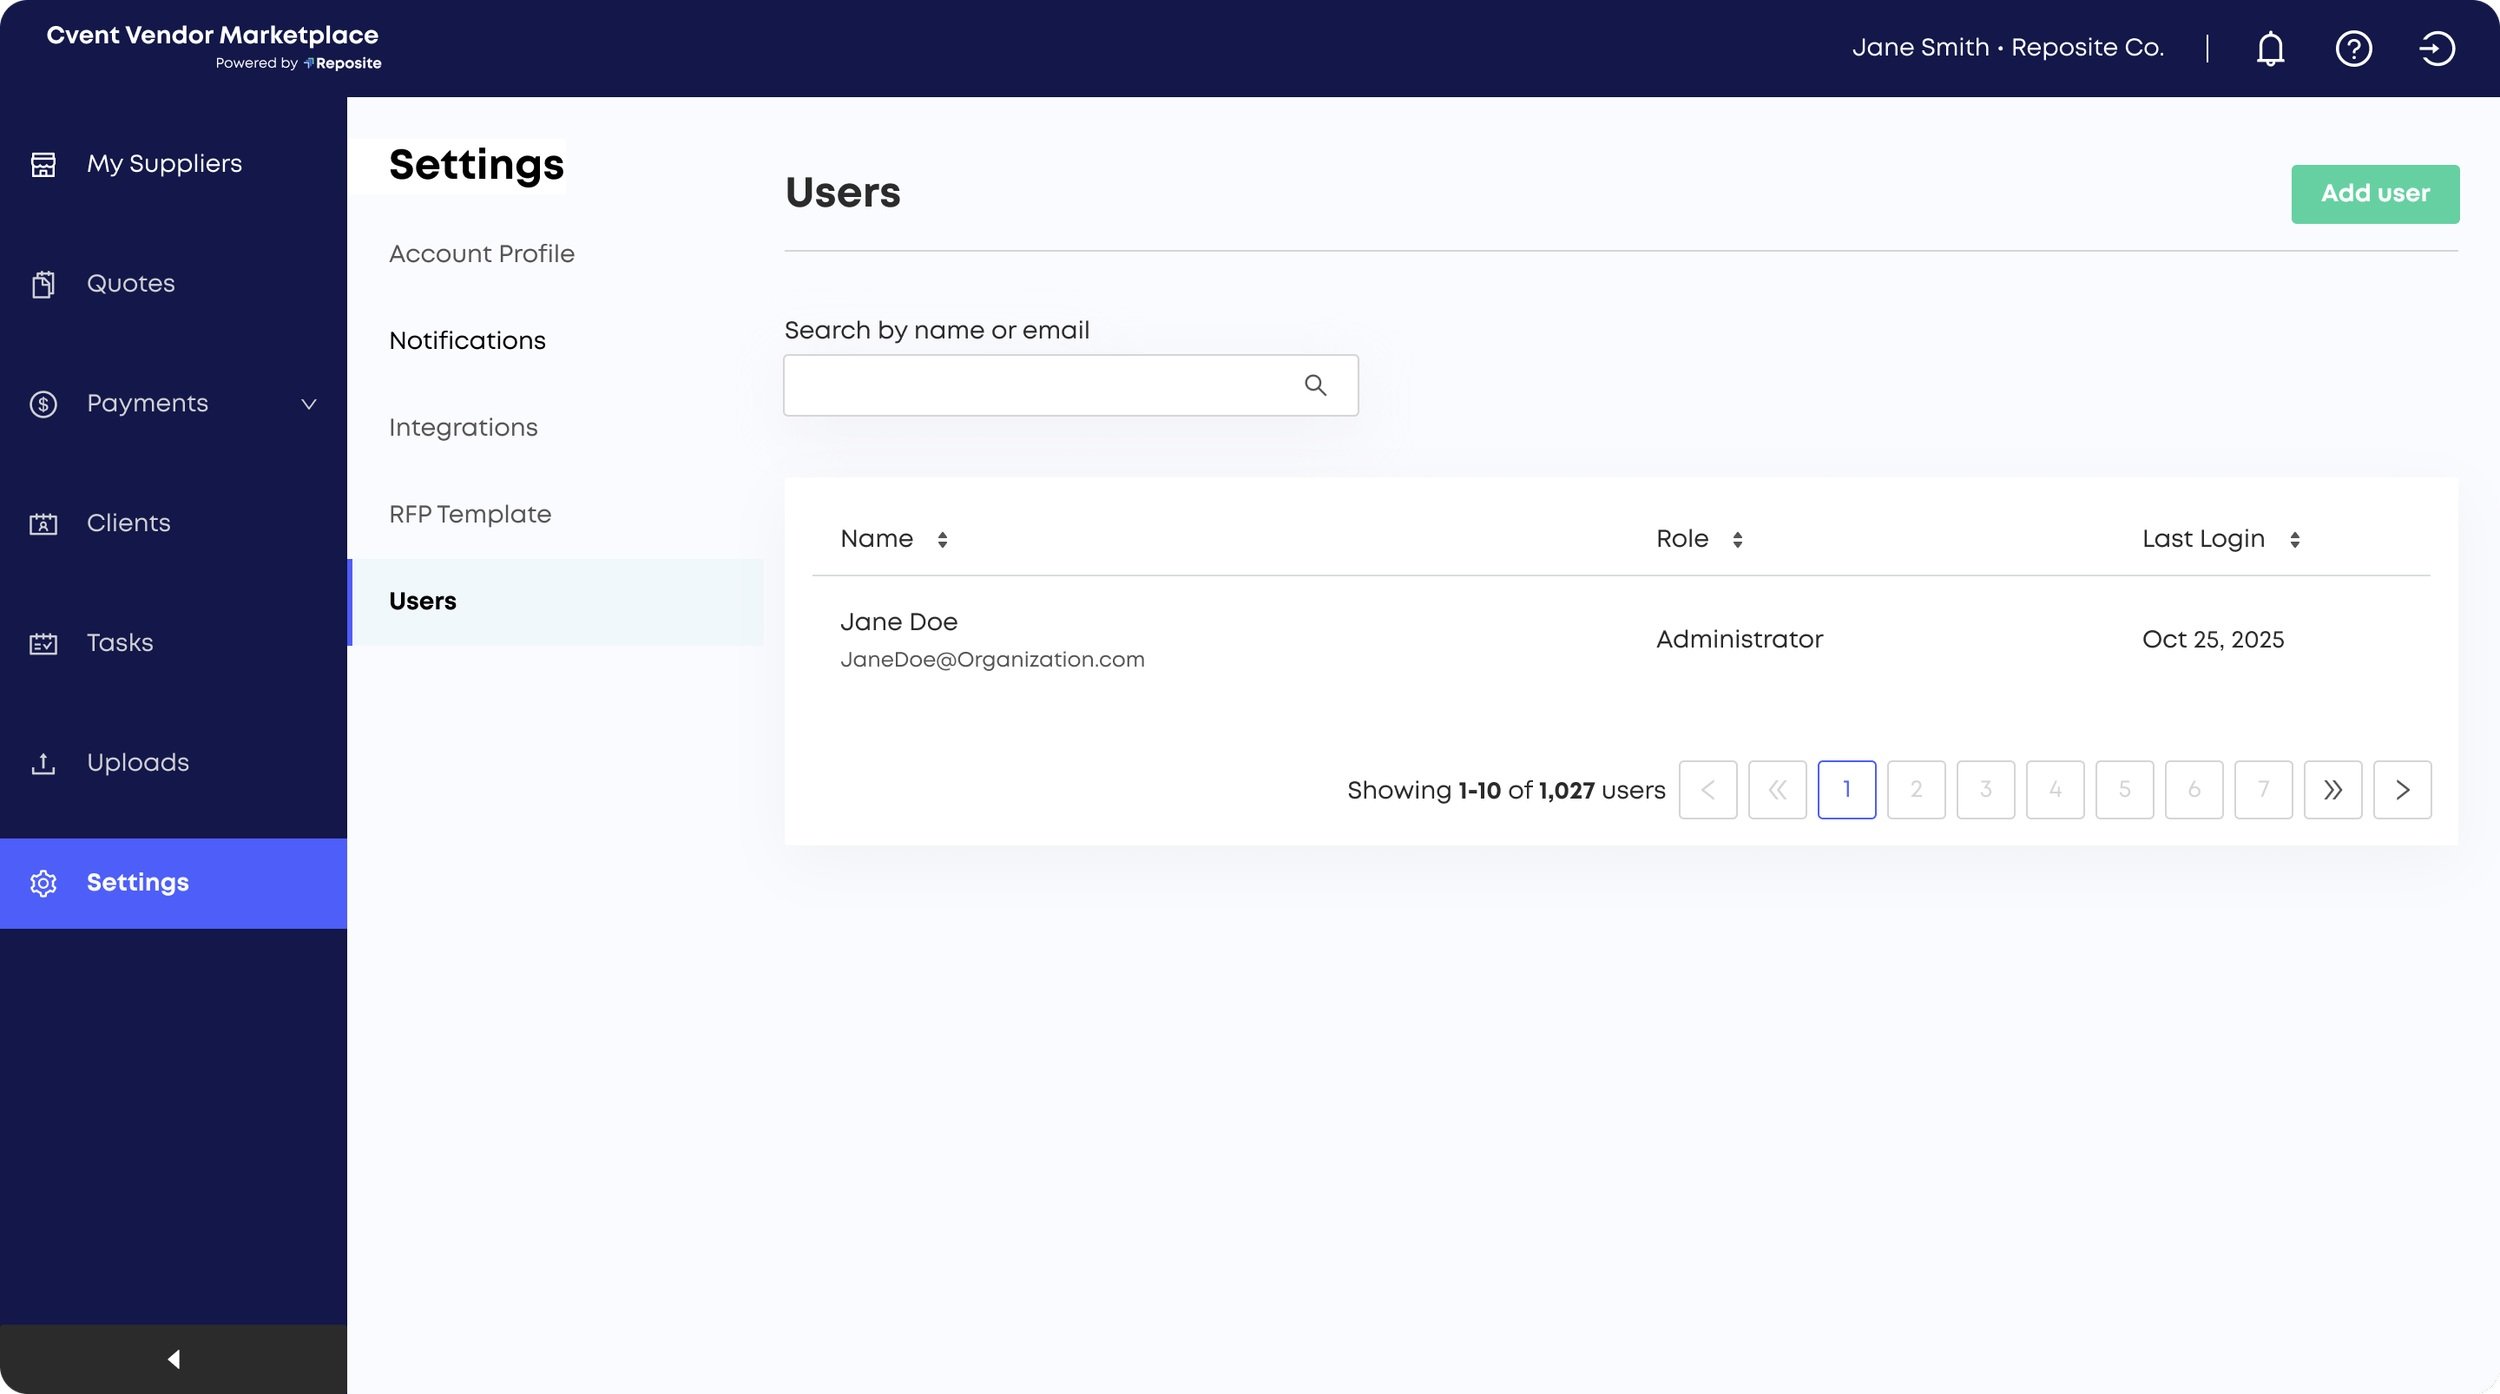
Step 1: Navigate to the "Users" Page
Click into the Settings Tab on the left side navigation menu
Select the "Users" section (previously named "Teams") - This page shows a list of everyone in your organization, including their name, email, role and last log-in date
Step 2: Invite a Team Member
From the "Users" page, click the "Add User" button in the top right corner

2. A modal will appear prompting you to enter the recipient’s email address and will ask you for the preferred User roles and permission.
3. Type in your team member’s email and click "Send Invite."
Note:
You’ll see an error message if the email has already been invited or is already in the system.
You’ll be prompted to resend the invite if needed.
Step 3: Email Invitation
Step 4: Approval Process
Once you click "Send Invite":
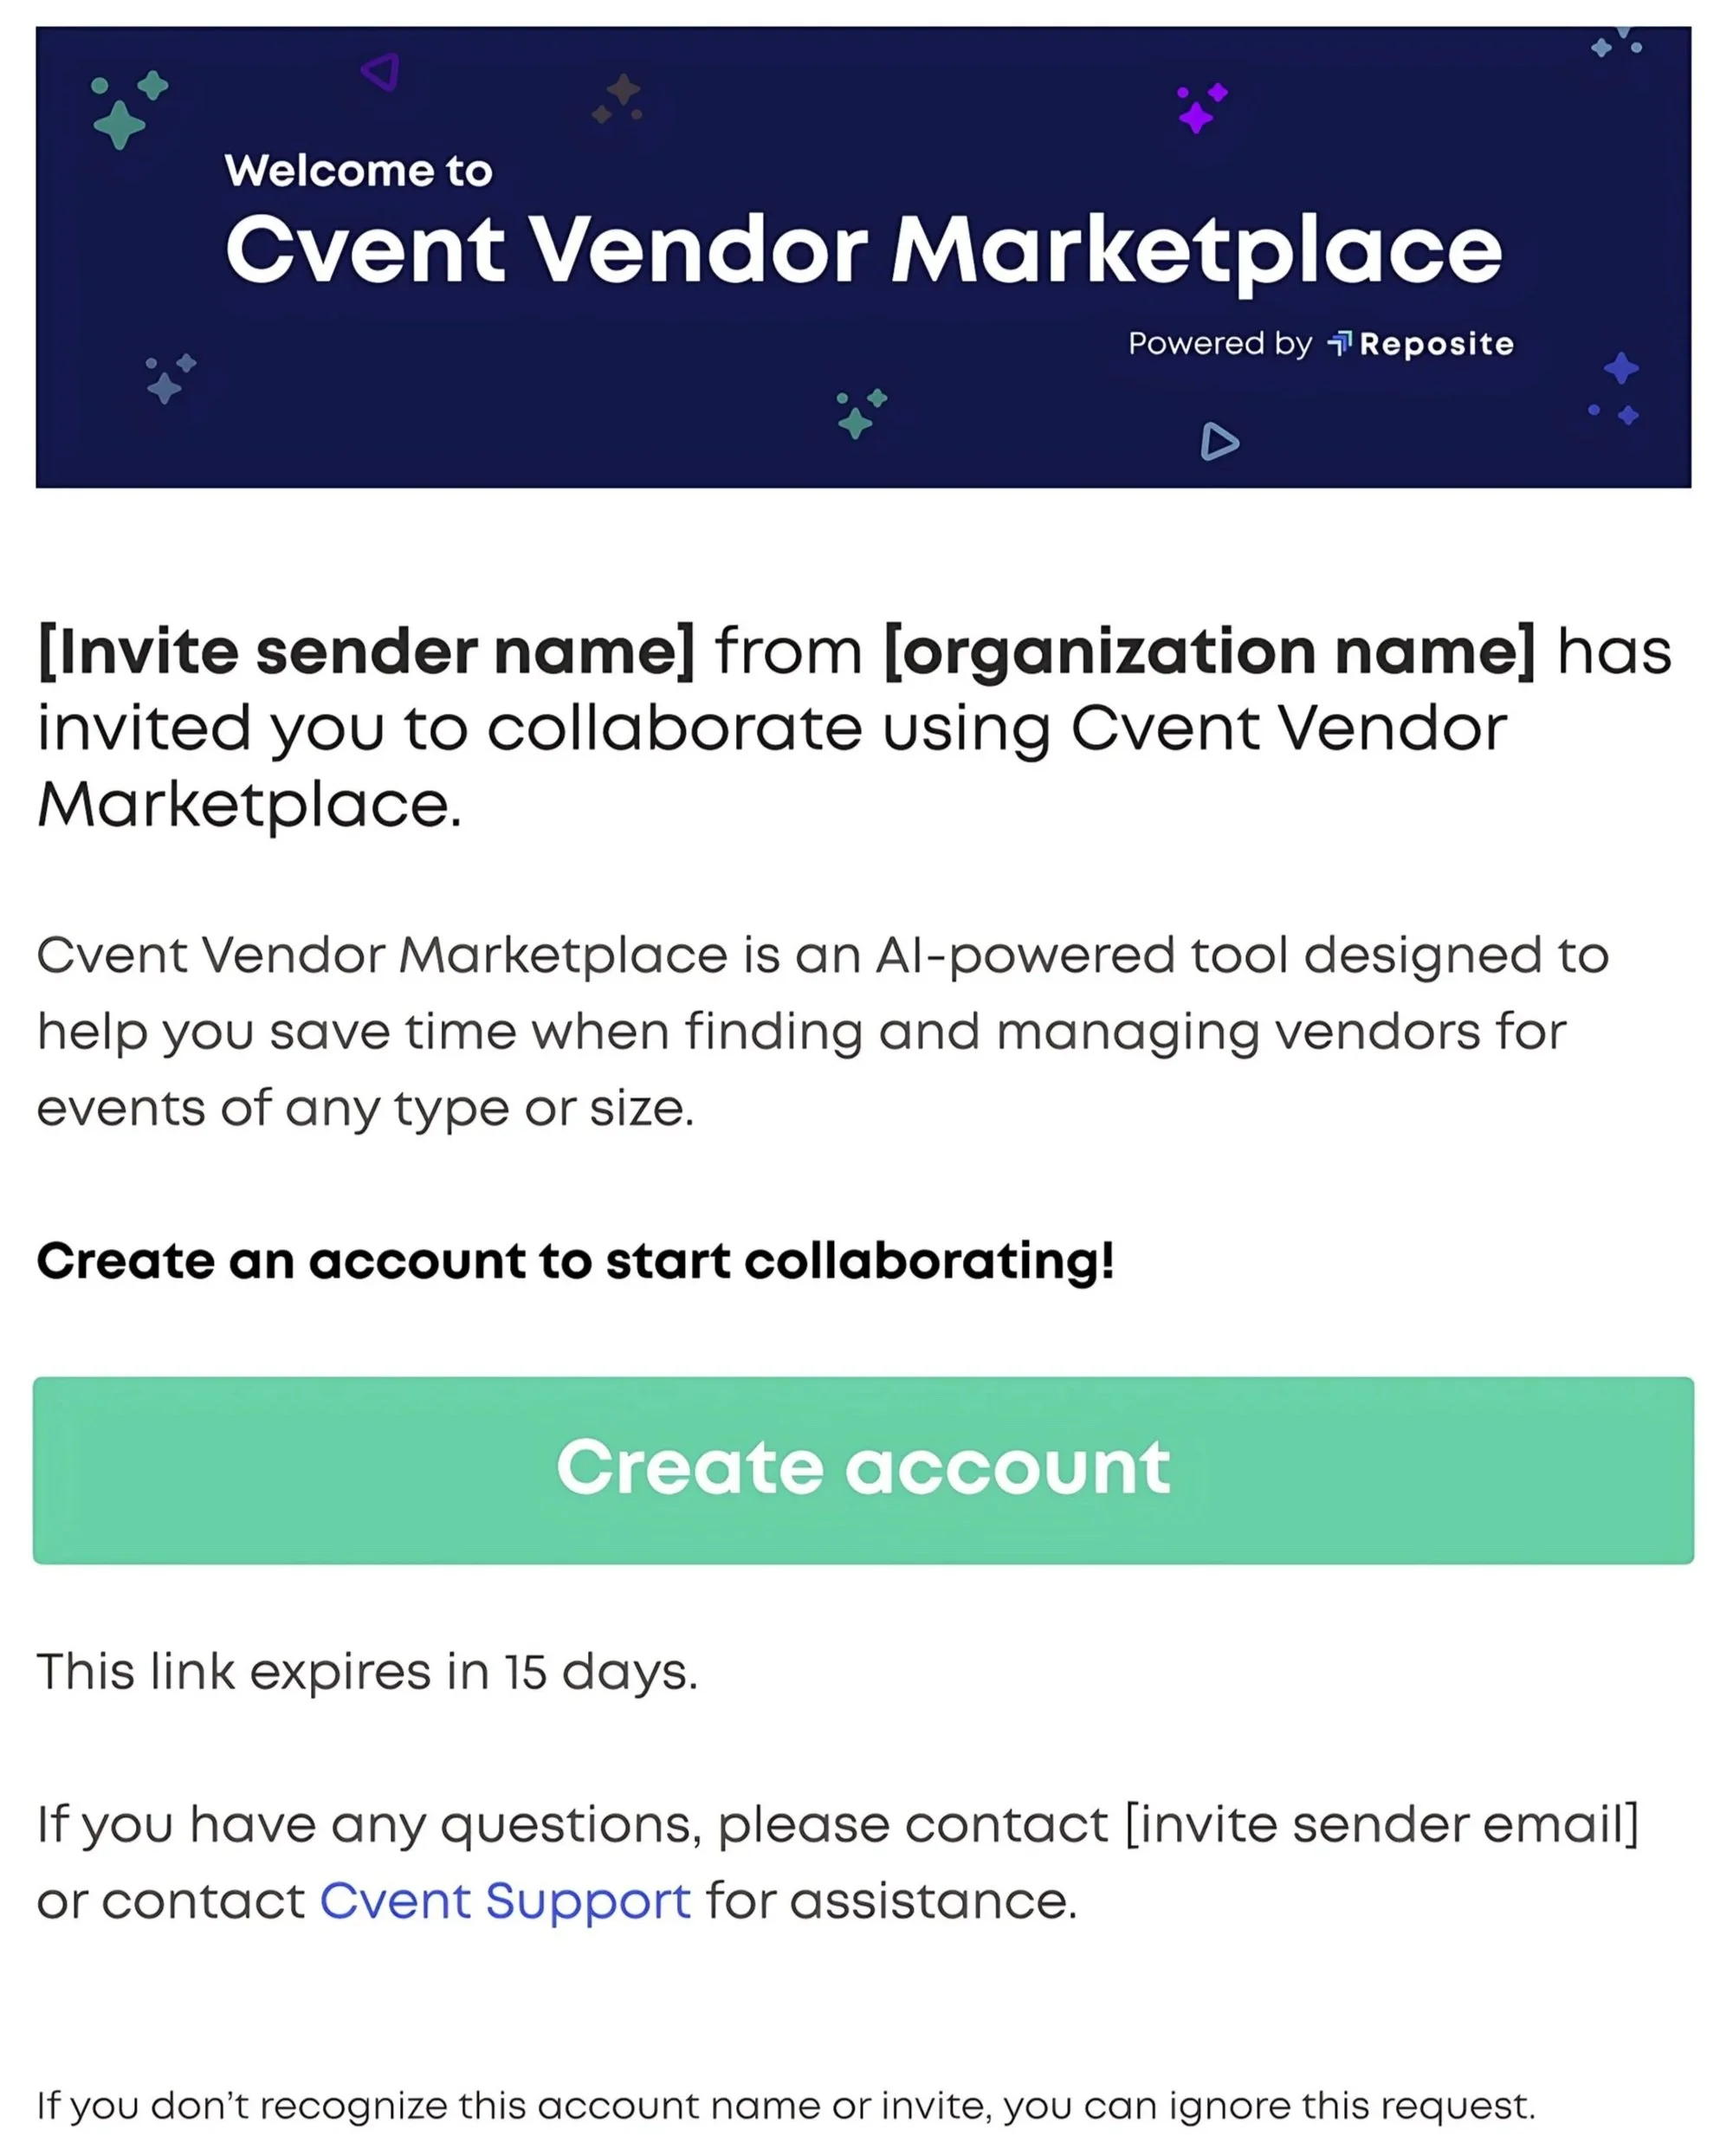
The invited user will receive an email titled "You're invited to join Reposite".
They must click the "Create Account" button in the email.
Their email and your organization name will be pre-filled on the signup page.

Important Details:
The invite link expires after 7 days.
If expired, the user will be redirected to a page where they can request a new invite.
If they encounter issues, they can contact Reposite support.
Reposite has two different approval flows depending on the invited user’s email domain:
Same Domain: If the user shares the same email domain as the inviter (e.g., both are @company.com), their signup is auto-approved.
Different Domain: If their domain is different, they will see a page that says “Hold tight!” - this indicates that their account will require manual approval by Reposite’s internal admin team, which is usually processed within 1 business day. If you need to accelerate the approval process, contact your Account Manager.
User roles and permissions


Admins:
Full visibility and control over all projects and account settings
Can add/remove users, assign roles, manage account profile, payments and email settings
Can manage collaborators on any project
Cannot make changes to own user login.
By default, admins will not get notifications for RFPs on the project unless they create or edit a project or any of its RFPs.
Note - When removing a user, admins can transfer that user’s projects and RFPs to another user or themselves.
Full Access Users:
Can create, view, and manage their own projects and any projects they are added to as collaborators
Can manage contacts, invite suppliers, and upload files
Cannot change account-wide settings
Can only add full-service or read-only users; can not remove users
Read-Only Users:
Can only view projects they created or are added to as collaborators
Cannot edit, add, or delete information within the account
No Access Users:
Can not access the specific account if a user is updated as a “no access user”.
"No Access" users are blocked from accessing the application, even if they try to log in directly or via SSO.
This role helps admins manage user access more granularly, especially in large organizations with many users and changing team structures.
When a user is set to "No Access," they are effectively deactivated for the Reposite account, but their user record remains for audit or administrative purposes.
Up Next
Need additional help?
We’ve got you covered – simply request a demo and a member of our team will reach out to answer any questions you may have.