
Building & Designing a Proposal
We know that proposals serve as a crucial tool for our Planners to articulate their vision and offerings to potential clients. A well-crafted proposal not only conveys professionalism but also provides a clear and detailed outline of the proposed travel experience, instilling confidence in clients. The Reposite Proposal Builder is a powerful tool to captivate clients, differentiate from other Planners, and ultimately boost business by securing more bookings.
Reposite’s built-in Proposal feature is ideal for quickly and easily making elegant project proposals to be sent to clients.
Accessing the Proposal Feature
Step 1. Click the Projects tab in the left navigation.
Step 2. Click on the project for which you would like to create a proposal for. The selected project’s dashboard appears.
Step 3. Click on the Edit Proposal button in your project’s dashboard. The project’s proposal page appears.

Basic Functions of the Proposal Feature
In order to properly follow later sections of this guide and learn more about the Proposal feature, it is important to understand the basic functions of the Proposal feature that enable you to edit and customize your proposal.

The Edit button will appear next to or below various textual elements in your proposal that are able to be added or edited. Click this button to add or edit the corresponding text or change corresponding dates.

The Delete buttons will appear next to any content that is able to be deleted. Click this button to delete the corresponding content.

Boxes with a dotted outline allow for the addition of new content sections, content “blocks” (content added within a section), and images. Click on the corresponding box to add your desired section, content, or image.
Proposal Content Sections
Reposite’s Proposal feature makes proposal design and creation simple via its use of customizable sections. Each section is pre-formatted, simply requiring you to add in your own information to produce a sleek and professional proposal.
Step 1. Click within the dotted-outline box labeled “Click to add a section.” A new navigation menu appears on the right side of your screen.
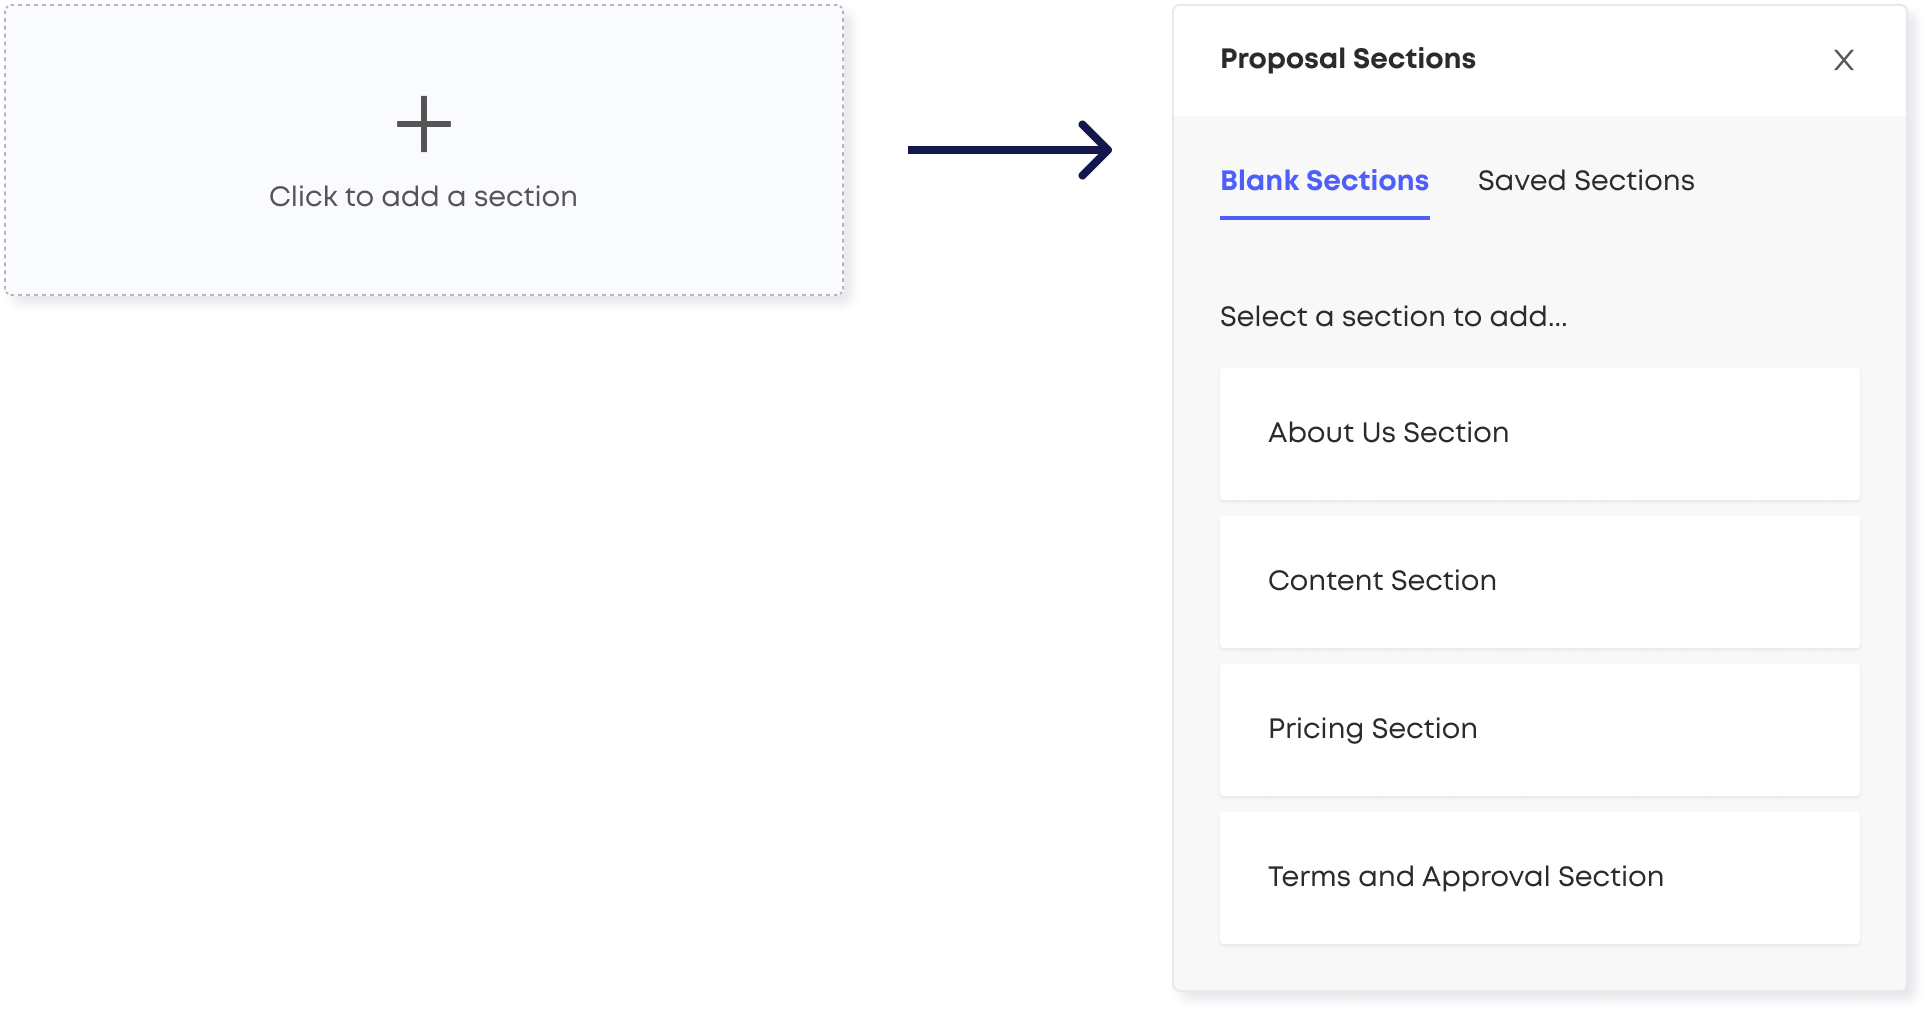
Step 2. From the menu, select one of the four section options outlined below:
About Us Section: Allows for an image, title, and short description. Use this section to explain a bit more about you/your company to the client.
About Us sections can also be saved for use in future proposals. Read Uploading ‘About Us’ below for more information.
Content Section: Allows for a variety of content to be added to your proposal via three different content “blocks,” listed below.
Text - Creates a space with formatted title and body sections to add any text you see fit. Each Content Section only allows for one Text block.
Image - Creates a space allowing for an image to be added. Each Content Section only allows for one Image block.
Supplier - Allows for you to select a pre-existing supplier profile to be added directly into your proposal. This will include the supplier’s profile image, name, and description. Supplier blocks can also be saved for use in future proposals. Read ‘Saving and Uploading Supplier Blocks’ below for more information.
Pricing Section: Adds a customizable table allowing for the input of custom items and their price. The table will automatically add up each item into a grand total.
Terms and Approval Section: Adds a section titled “Terms and Conditions” with space for custom text to be added. A checkbox allowing for clients to approve the proposal is additionally added underneath the text.
Pro Tip: We recommend adding suppliers to proposals during your Quote Review process, where you can use our AI “Add to Proposal” button to generate a customized supplier description based on the specifications you discussed in your conversations. We find that planners prefer this workflow vs. pulling in the generic descriptions of the supplier profile, because it saves time and allows you to focus only on adding the final touches. You can learn more about using the AI-powered “Add to Proposal” tool here.
Saving and Uploading “About Us” Sections
The “About Us” content section can be saved for promoting your business by reuploading in all future proposals. This makes proposal creation far quicker and adding the “About Us” section a three click process in the future.
Part 1: Saving an “About Us” Section
Step 1. Select the Save Section As… button next to the “About Us” section you’d like to save. A pop-up window appears.

Step 2. In the pop-up window, enter the name you’d like your content section/block to be identified as.

Step 3. Select Ok. Your “About Us” section has now been saved.
Part 2: Uploading a Saved “About Us” Section
Step 1. In a new proposal, select within the dotted-outline box labeled “Click to add a section.” A new navigation menu appears on the right side of your screen.

Step 2. Select Saved Sections within the new menu. A list of your saved “About Us” sections will appear.
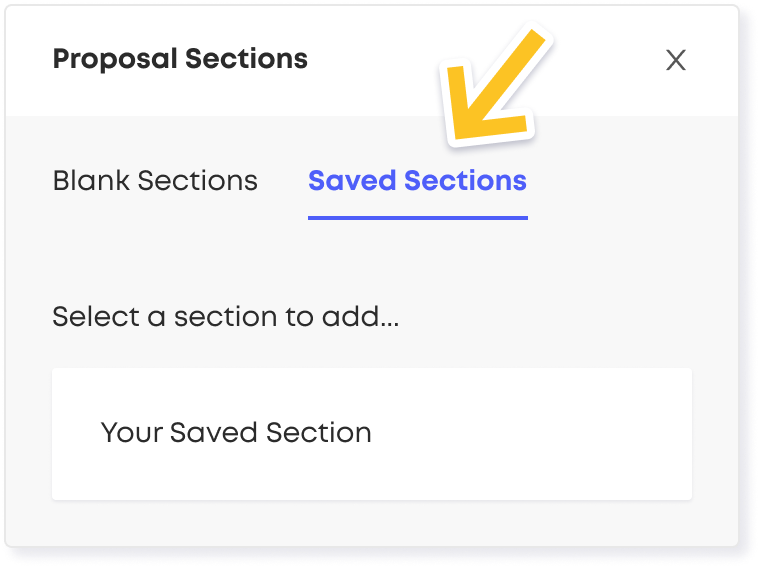
Step 3. Select the desired section to immediately add it to your proposal.
Saving and Uploading Supplier Content Blocks
Supplier content blocks can be saved to be reuploaded and used in future proposals. This is helpful when repeatedly working with the same suppliers and needing to quickly add them to new proposals.
Part 1: Saving Supplier Content Blocks
Step 1. Select the Save as… button next to the supplier content block you’d like to save.

Step 2. In the pop-up window, enter the name you’d like your supplier content block to be identified as.
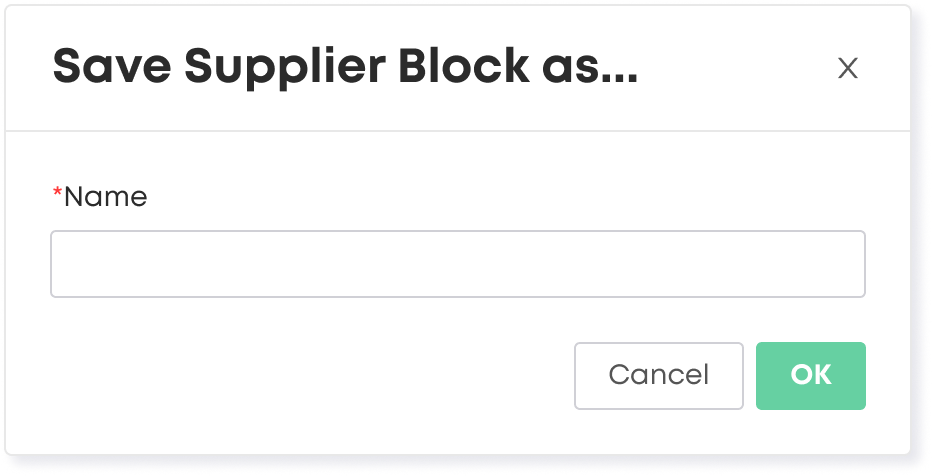
Step 3. Select Ok. Your supplier content has now been saved.
Part 2: Uploading Saved Supplier Content Blocks
Step 1. In a new proposal, add a new “Content” section.
Step 2. Click within the dotted-outline box labeled “Click to add a content block”. A new menu appears.

Step 3. Select “Supplier” within this new menu. A list of your saved supplier content blocks will appear.
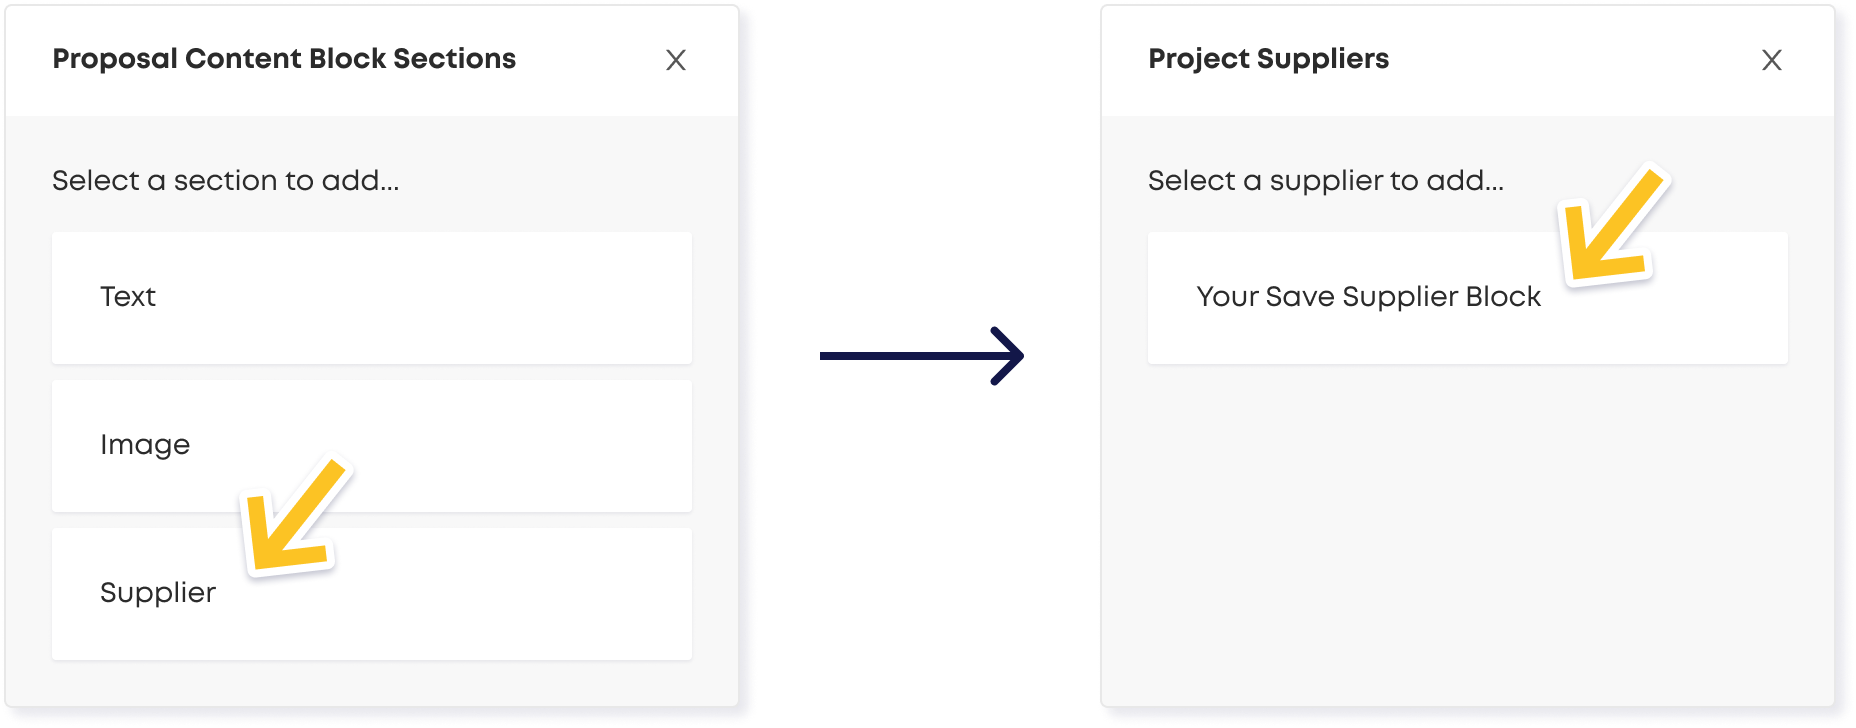
Step 4. Select the desired supplier content block to immediately add it to your proposal.
Sharing Your Proposal
Reposite’s Proposal feature additionally allows you to view your proposal as it would appear when sent to a client. Use this function to review your proposal before sending it to a client for approval.
Sharing Your Proposal Link
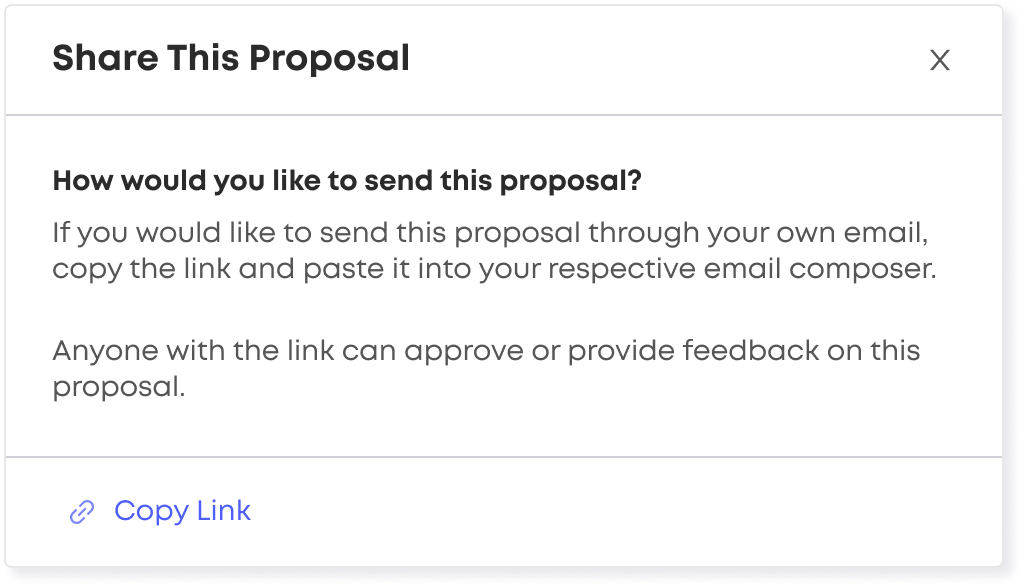
Step 1. Click the Share button at the top of the proposal editing window. A pop-up modal appears.

Step 2. Click the Copy Link link to copy the link to the client proposal and paste in any outside communication to share with your client.
Viewing and Responding to Your Proposal as a Client
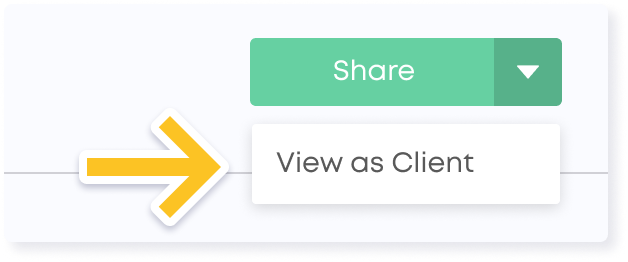
Step 1. Click the small arrow next to the Share button at the top of the proposal editing window. A drop-down menu appears.

Step 2. From the drop-down menu, click View as Client. A window appears, allowing you to view your proposal as a client would.
Step 3. From here, the Client can perform different actions on your Proposal:
Provide Feedback: The client can click this to open a modal over the proposal with a textbox. Here they can enter feedback that will share over to you on your project overview page. This is a great way to keep all feedback organized in one place.
Download: The client can download the Proposal as a PDF or PNG. This way they can save or print the proposal on their own.
Note: If the proposal is multiple pages long, the best practice is to download the proposal as a PNG.Approve Proposal: The client can click this link when they are approving the project proposals. This will bring up a congratulations modal for the client. You will be notified via email once they are approved.
Up Next
Need additional help?
We’ve got you covered – simply request a demo and a member of our team will reach out to answer any questions you may have.